Modifying Storage Pool
Today I will be modifying my storage server, adding a new drive to the storage pool, and changing the main storage from a simple layout to a parity layout.
Initially when this storage server was setup, it was installed with a SSD boot disk, and 2 4TB harddrives. Later I added a second SSD that would be used as a write cache. Today, I added a 3TB hdd.
The existing storage pool has 3 virtual disks (all thin provisioned): a 5TB main storage drive setup in a simple layout, a 1.5TB user storage setup in a mirror layout, and a 800GB vm disk setup in simple layout.
Now Windows Server 2016 does not allow modifying an existing virtual disk to change the layout from Simple to Parity, so after creating the new virtual disk, we have to copy the existing data to it.
Microsoft also has an article describing why you may want to choose any of the different types, note that this article is for storage space direct, and we are using the non-direct storage pool option (as there is only 1 storage server on the network).
In terms, a simple volume gives you 100% storage space of all disks used, two-way mirror gives you 50%, three-way mirror gives you 33%, and single parity gives you 66%.
So let’s get started.
Start by launching powershell, and running the new-virtualdisk cmdlet
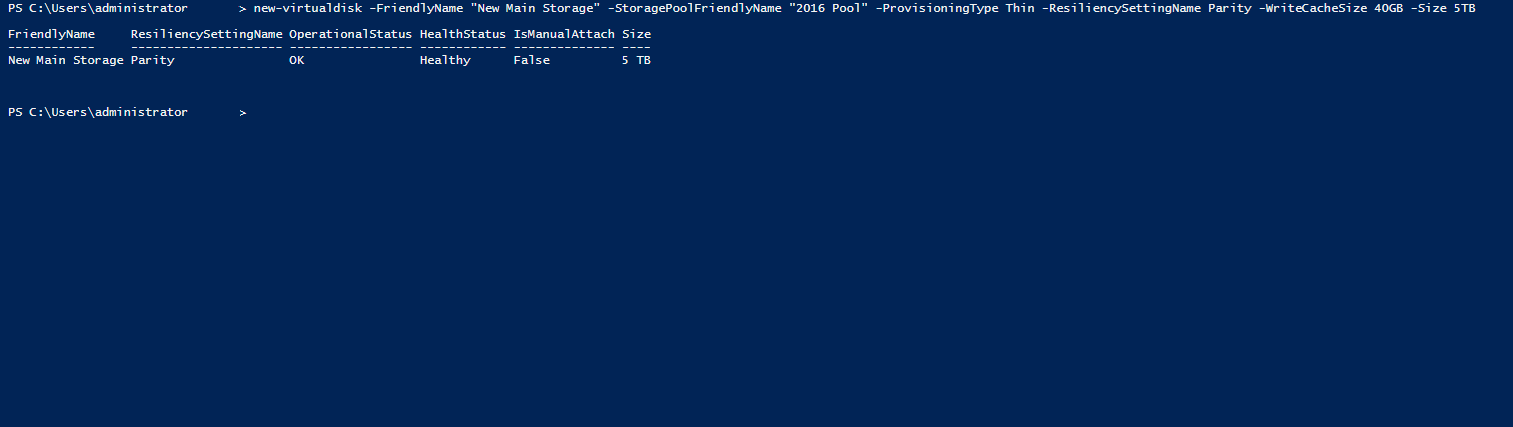
There are quite a few parameters that you are able to tune your environment to your liking, I created a friendly name of “New Main Storage” on the storage pool created named “2016 Pool”. We used a Thin provisioning type, with parity set as recilience, with a 40GB write cache, with a total volume size of 5TB. (Now you can create this through the server manager as well, but there is no option to specify a write-back cache size through it, so we revert to powershell.)
There will come a time in the future (when 3TB - roughly 2700GB - of data is reached) that we will run out of physical disk space on that virtual disk, as the lowest common denominator we have is a 3TB disk. That will be something to work on when we reach that at a later time! An easy way to avoid that, is to set the max storage size of the parity volume (or any volume type that is thinly provisioned) to the lowest disk size. Such as a simple volume of 10TB in size, should be physically backed by 10 or more terrabytes of storage.
When that disk becomes full, a new disk must be added (or data removed) to continue operating.

Now we can head to the server manager, and navigate to the file and storage services area, into the storage pool information. Here you can see our new virtual disk we created (New Main Storage)
We will need to initialize the virtual disk, and create a volume on it, so head over to the Disks tab on the left.
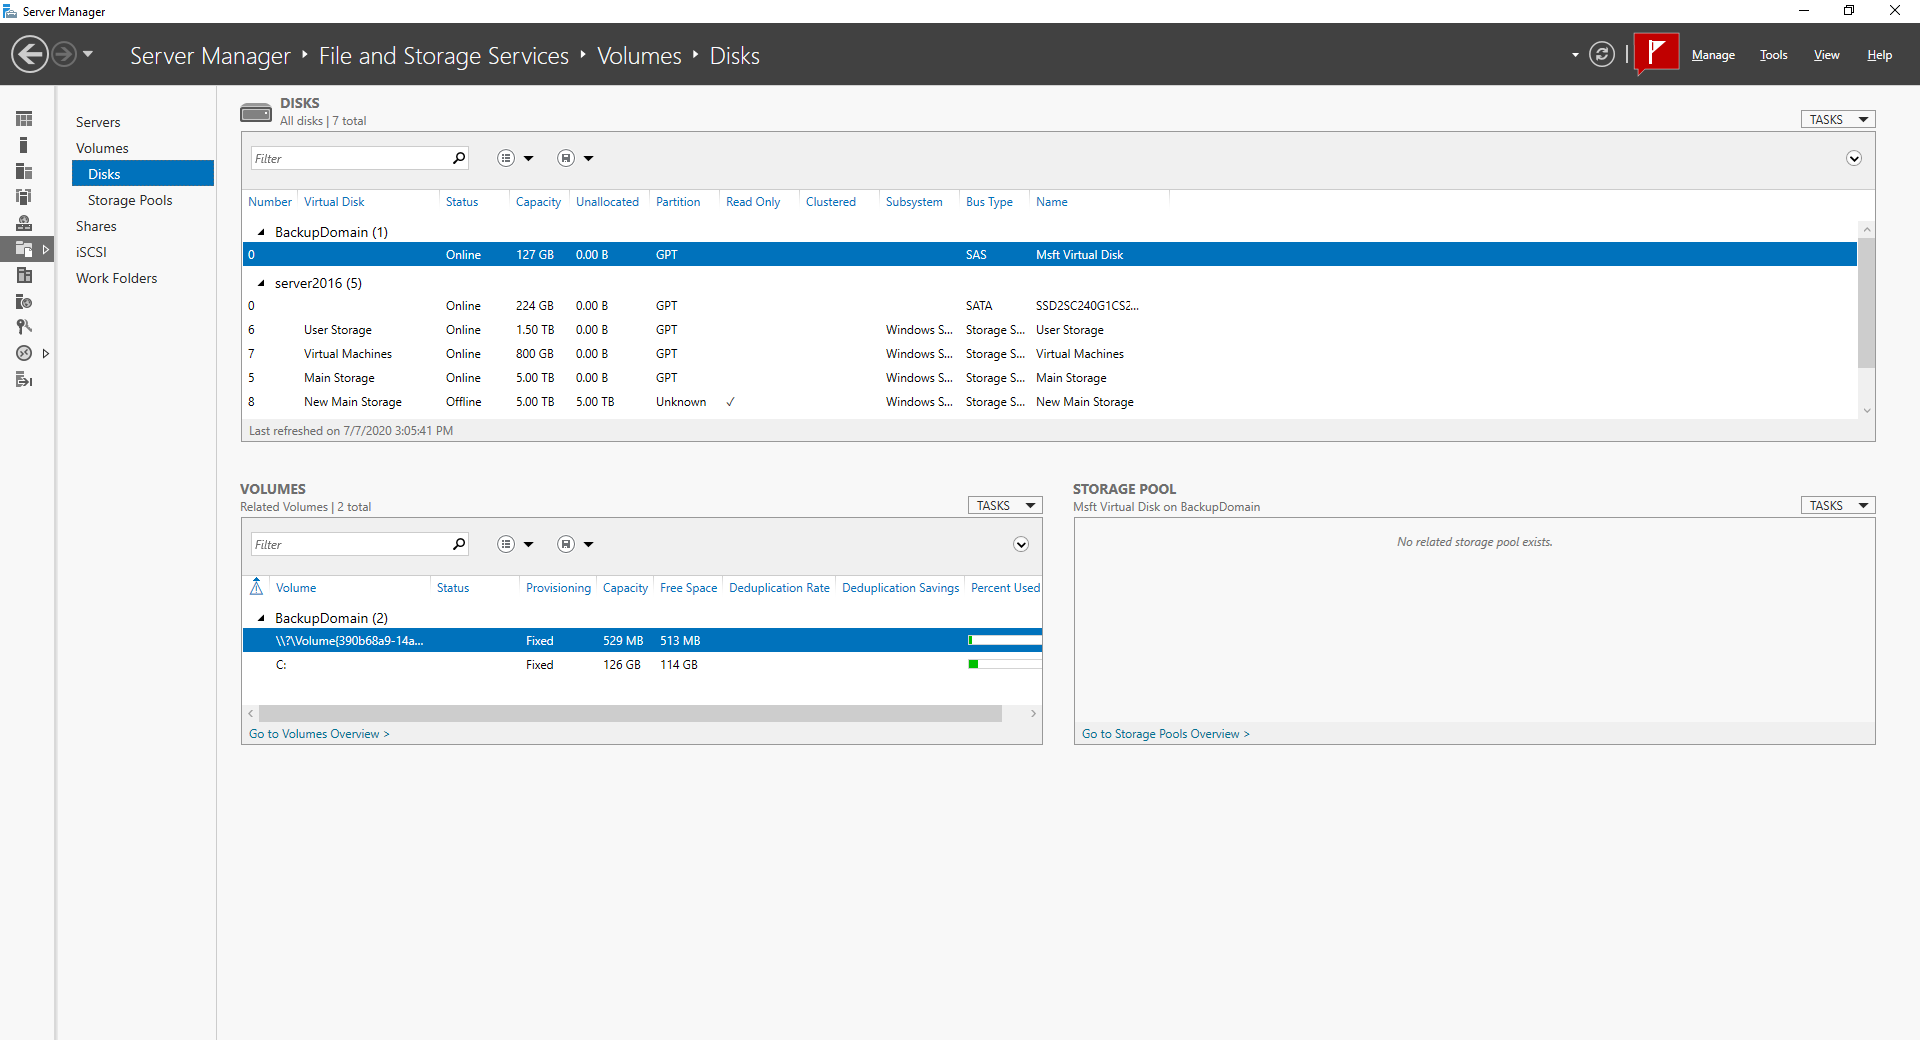
We can see our new virtual disk in the list, labeled 8 New Main Storage. We can see that it is offline, so right click, and bring online. After the disk is online, we can create the volume on it. Right click create new volume, and follow the prompts.
After that, we can move our data over from our existing virtual disk to the new one.
For performance comparison, I ran Crystal Disk Mark on the old simple, and new parity volumes. The test was ran with 2GB test size.
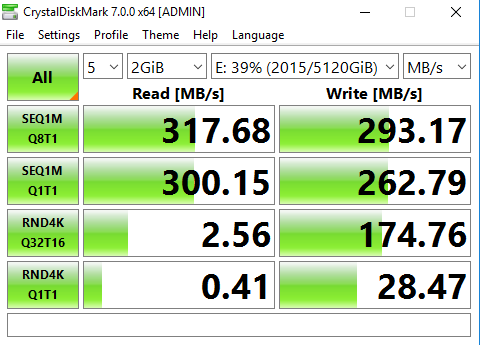
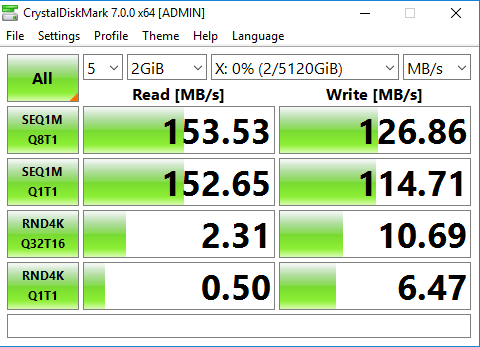
The disks in the simple layout are able to perform up to about 180MB/s, while the new disk added is able to perform up to about 150MB/s.
Comparing the performance of both types, we can see the simple volume pretty much combined the read/write speed of both disks together. With the parity layout we see something different though: the read and write speed are the lowest common denominator of all 3 disks: the 3TB disk that was added.
So putting that into question, what is important in your environment?